Computer Skills for Research
Arduino Prototyping Controller
By Mark Ciotola
First published on October 10, 2019. Last updated on June 14, 2024.
The Arduino prototyping controller lets you build all sorts of computerized gadgets. It does not run Linux and you need a regular computer to program it. However, if you need to build a local environmental monitor, data logger, or stand-alone visualization or gaming device, then an Arduino may fit the bill.
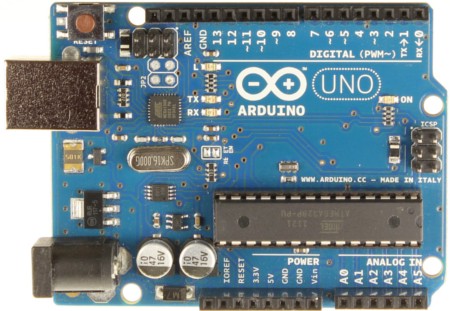
An Arduino is a small electronics board that contains a microprocessor, various input and output sockets or pins, and many other useful items. Arduino come in many forms by various vendors. The basic form is called the Arduino Uno.

Arduino Uno
Arduinos are programmed with a form of a language family called C/C++. Although this is not the easiest language family to learn or work with, Arduinos interface comes with a lot of sample programs (called sketches”) that can be easily modified to do much of what you wish.
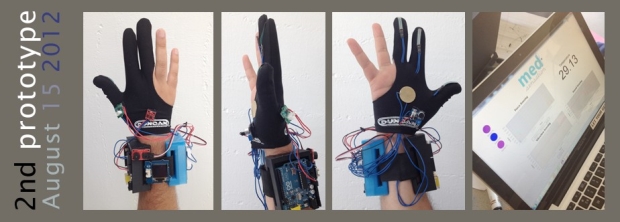
Often Arduinos are combined with other hardware to create useful devices.

Medical diagnostic glove with Arduino (credit: Medsensations)
Getting An Arduino
Arduinos can be made by any company, but some do not work very well and some are counterfeits. It is strongly recommended to buy your Arduino directly from an established vendor rather than through a third party platform.
Resources
- Arduino Reference
- Adafruit (commercial vendor)
- Sparkfun (commercial vendor)
Activities
You will need an Arduino (preferably Uno model) and an appropriate cable (which usually comes with the Arduino) to connect it to your computer.
- Download the Arduino Interactive Development Environment (IDE) which is called simply Arduino.
- Connect an Arduino to your computer.
- Open the Blink sketch (program). Upload it to your Arduino. If your Arduino’s LED blinks, go on to the next activity. If not, troubleshoot until it blinks.
- See if you can adjust the Blink sketch to change the rate of blinking.
« PHP programming to support simple web graphics | COURSE | Inexpensive Linux Computer: Raspberry Pi »